How to convert design to React code3 min read
Reading Time: 3 minutesAnima is here to help Front-end engineers deliver faster by automating the grunt work. Teams can convert Sketch, Adobe XD, or Figma into React code and save precious time.
Step 1: Sync your design
To get started, sync your design to Anima, or ask the designer on your team to:
- Get Anima plugin for your design tool.
- Click Sync
- Select Open project

Sync your design from your design tool to Anima

After syncing > select open project to get code for your design
Step 2: Code mode – Pick any component, get code
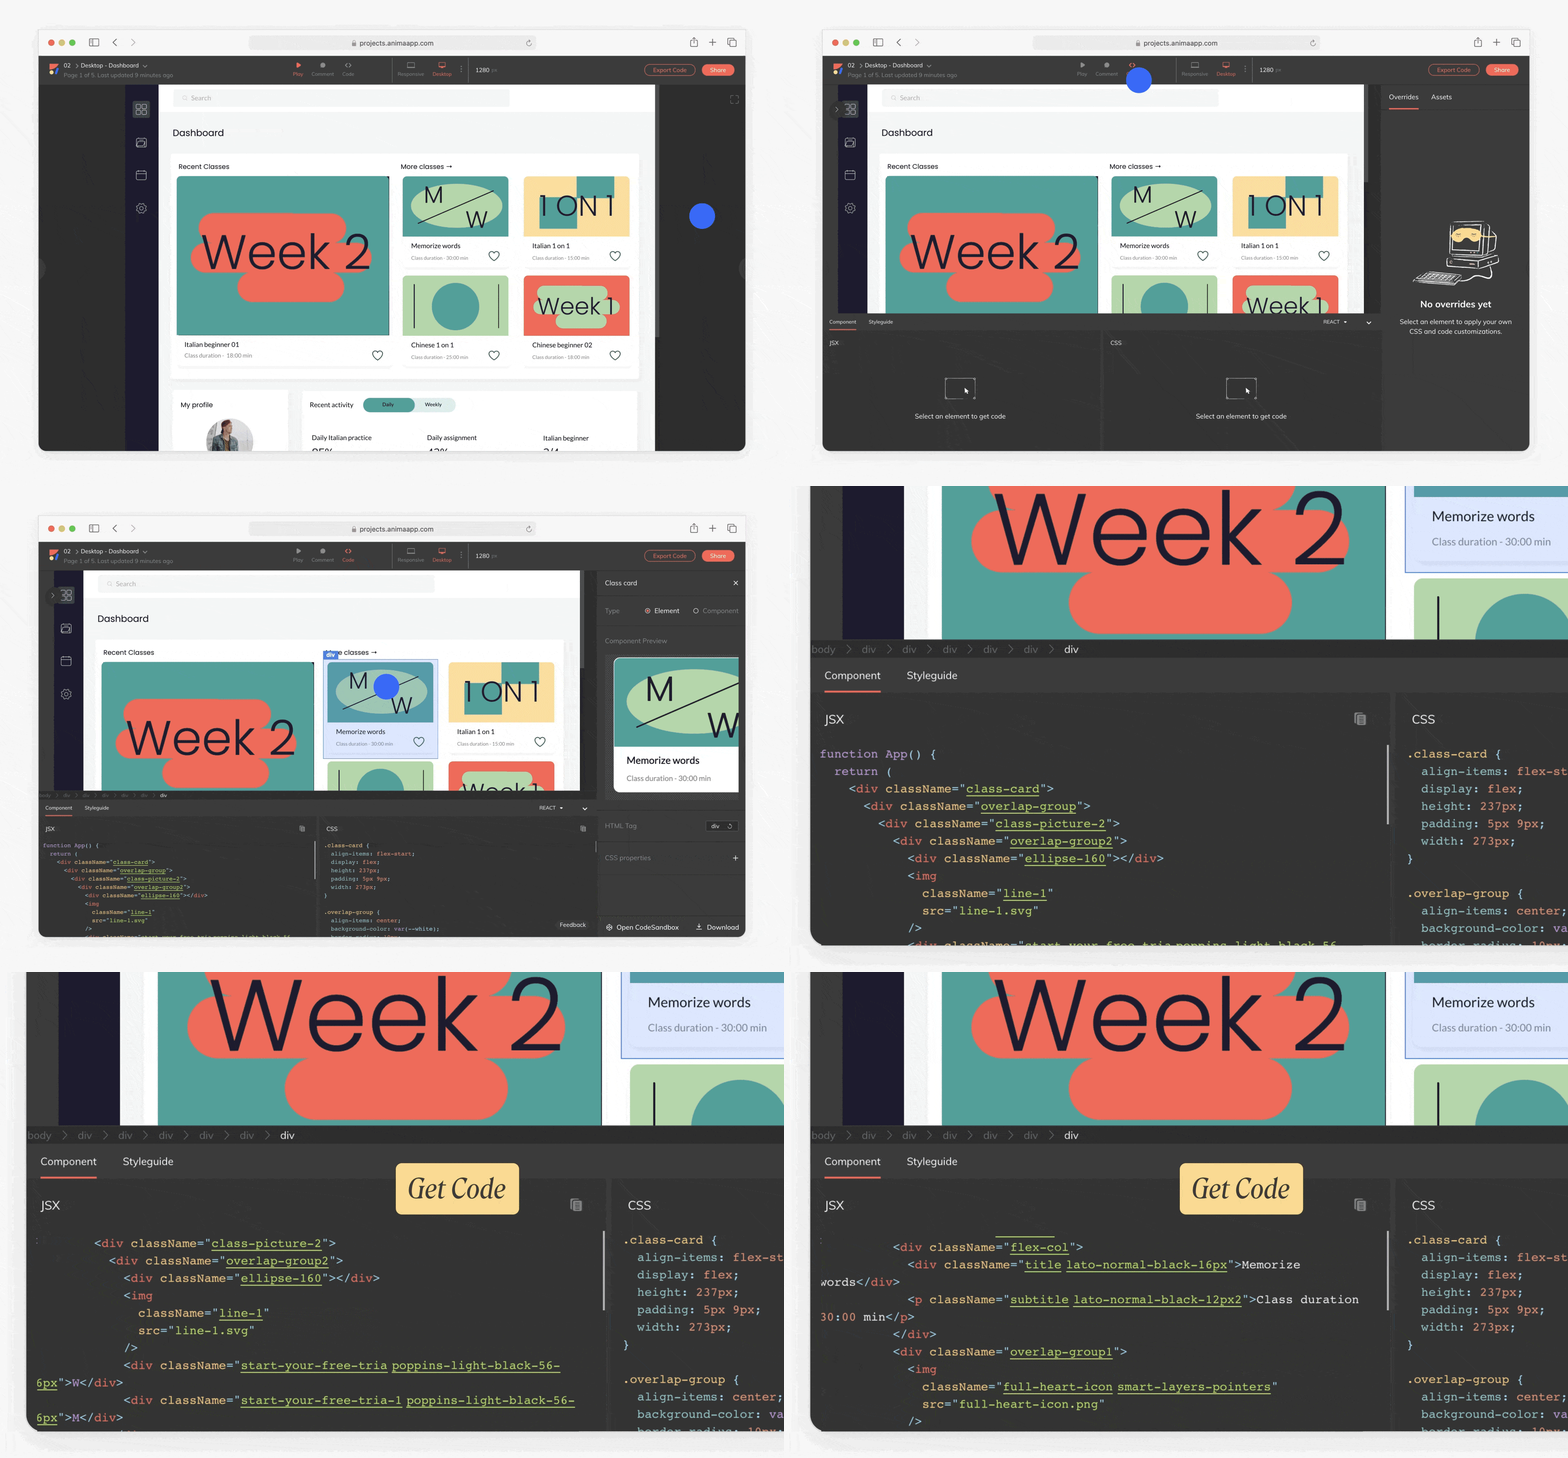
In the Anima web app, go to Anima’s code mode by clicking the ‘<>’ icon.
Select any element in the design and the code will appear at the bottom of the code panel, don’t forget to select React code.
More on the code you get:
- Code quality: The code is built for developers, so it is of high quality to allow it to be developer-friendly.
- Layout: We have optimized the code to have a CSS Flexbox layout. We merged layers, grouped, or ungrouped them in a way that gives you a clean snippet of code.
- Styleguide: We extracted repeating colors, text styles, and other CSS properties into re-usable CSS classes and variables.
- React code reuse: We detect elements repeating in the DOM structure and extract components automatically.
You may also mark repeating elements with the “Mark as Component” checkbox. - Naming: Anima gives meaningful names to layers that are generated automatically, you can rename any element manually in the Code-Mode right panel.
- No dependencies: There are no external libraries used, (aside from React in case of React mode)
- Continuously improving: Developer-friendly code is at the core of Anima. Our algorithms engineering team is constantly improving the code on a daily basis.
Feedback is very welcome at code@animaapp.com.
Help us build the future of front-end.
Getting React code
At the bottom code panel select “React” code.
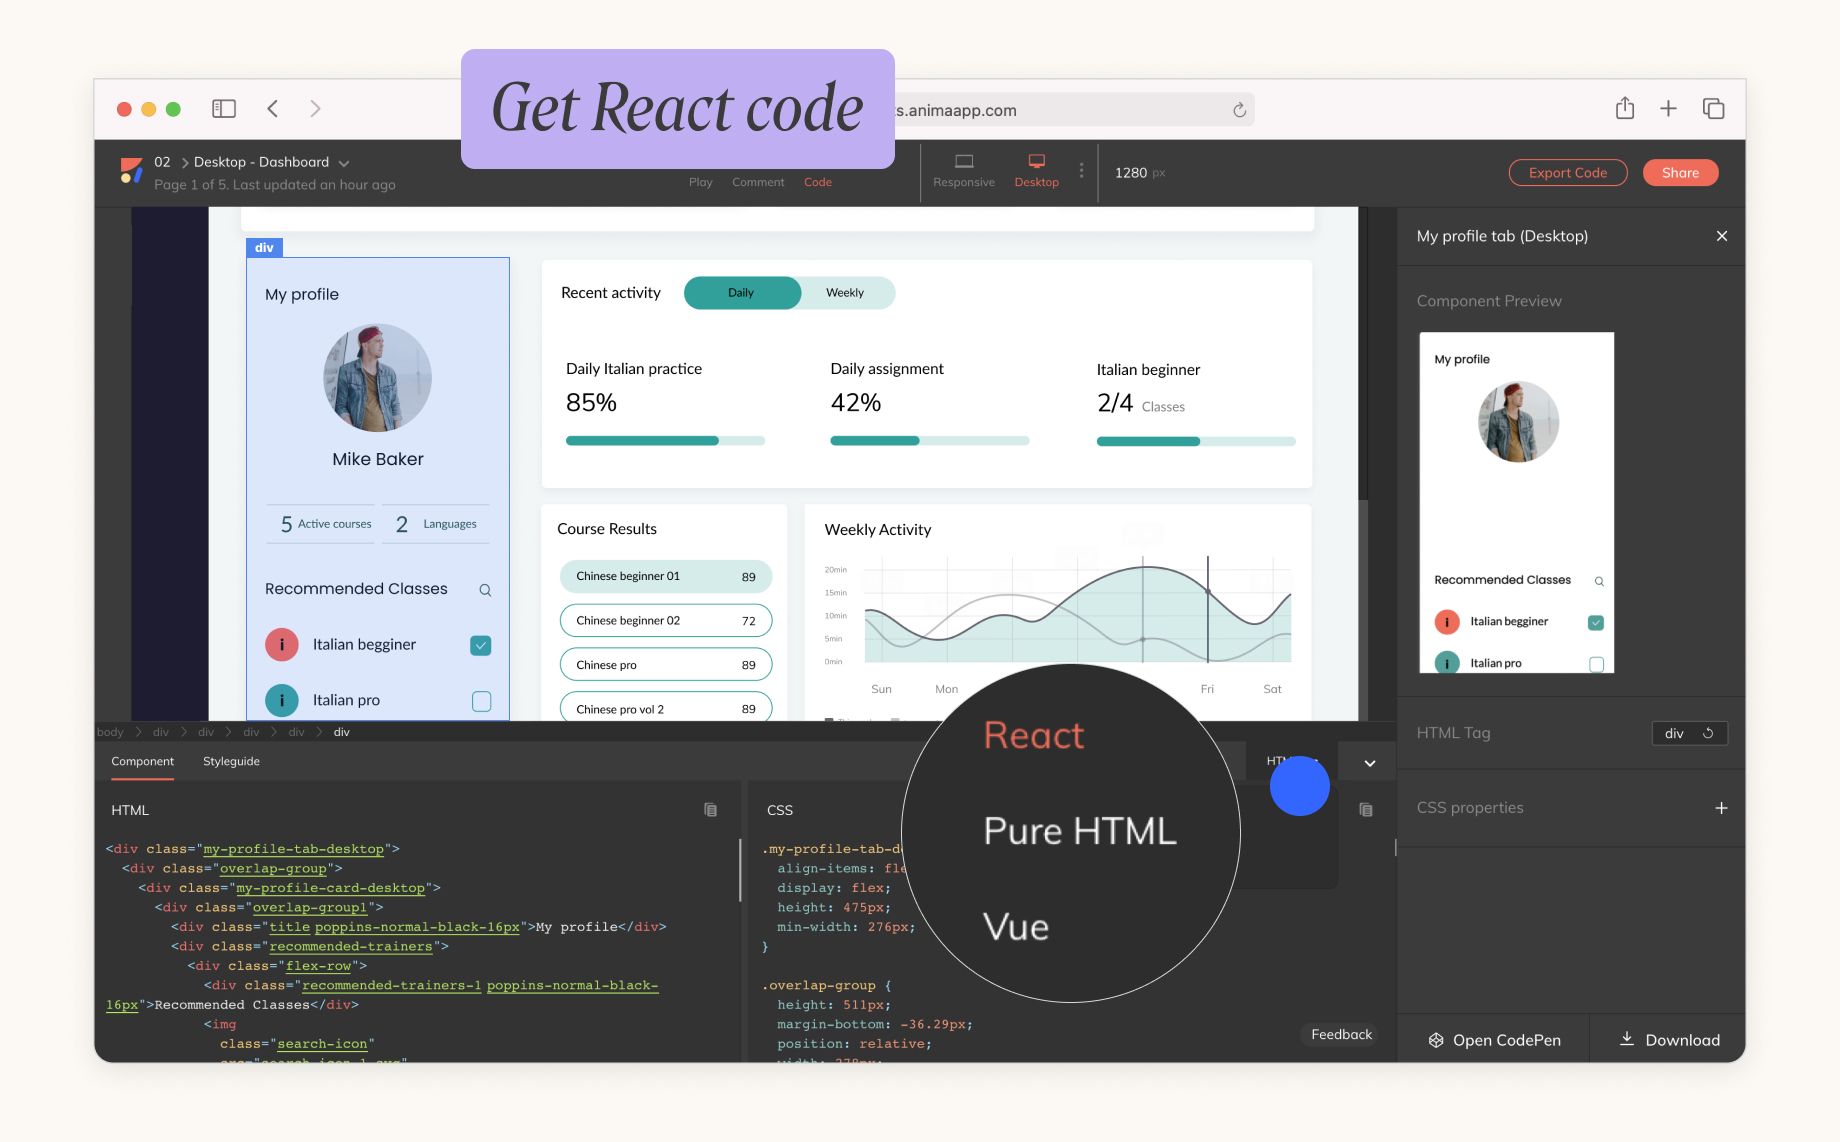
- Developer Preferences: You can select whether you want your code using class-based components or function-based components.
- Props: To have your code with the same content as in the design, we add const props. We keep it as clean as possible, not mess with your code.
Copy or test with CodeSandbox
Your component code is ready. What’s next?
From here, you continue on your IDE (VSCode, WebStorm, etc.)
- Simply copy the JSX & CSS and paste in your IDE.
- Or, jump to CodeSandbox to play with it beforehand.
In the case that you want to change the code, you can add CSS properties to any layer. These are called overrides.
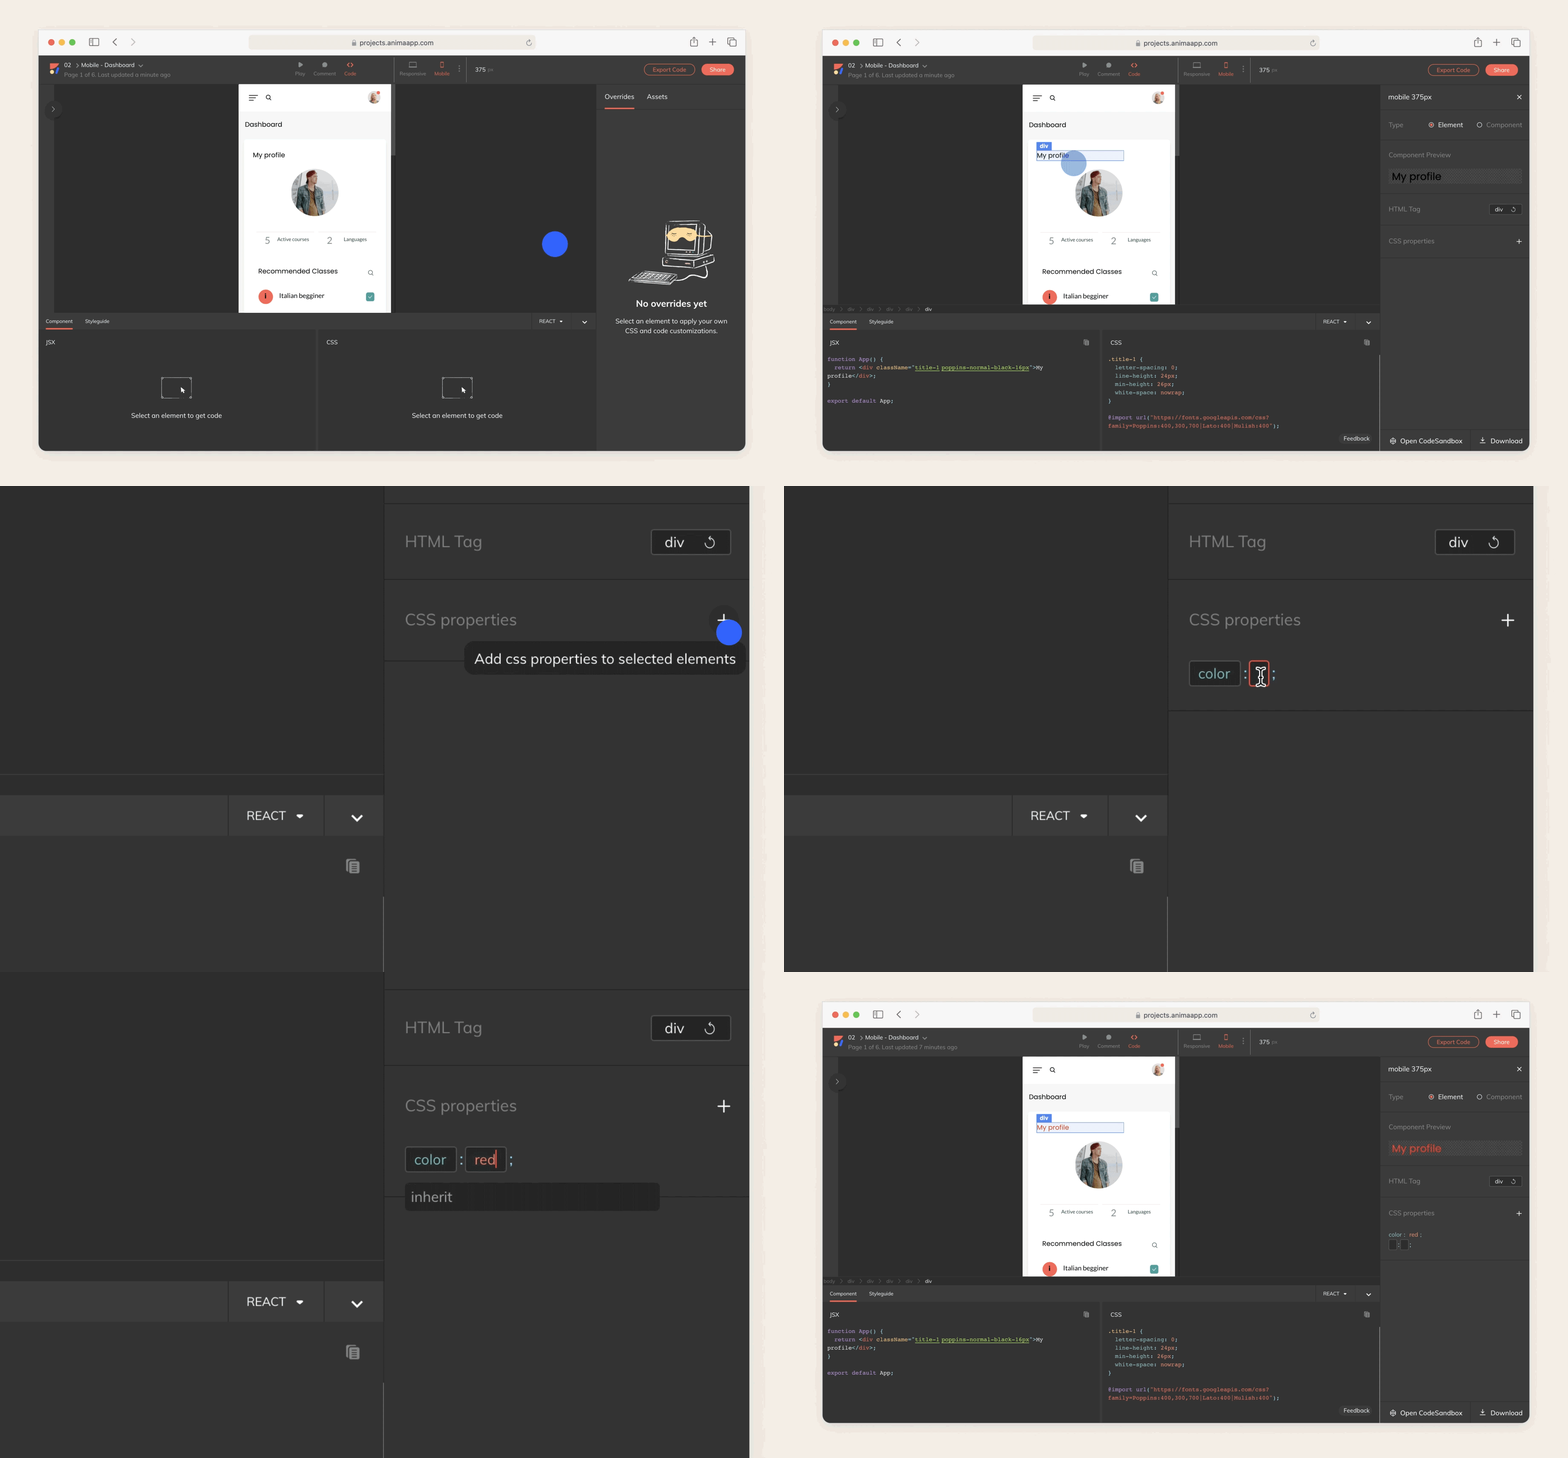
Code overrides in Anima
Why not add overrides in my IDE?
While you can do both, Anima will store your overrides. We will apply it to design updates as well.
Nested components
When producing React code, Anima may create nested components.
For example, you may see a Card component with a UserImage in it.
There are 3 ways to get a nested component:
- The designer used Symbols in the design to mark a reusable component.
- Anima has detected a repeating element in the DOM.
- The developer has marked a layer using the “Mark as Component” checkbox.
What’s next
Code quality is our top priority. In addition, more code frameworks are coming soon, such as Vue.js, Angular, SwiftUI, and Flutter.


 Figma
Figma Adobe XD
 Blog
Blog

