Twitter
 GitHub
 ブログ
ブログ
FigmaのデザインをTailwind CSSに変換する方法2 min read
Reading Time: 3 minutesFigmaからTailwind CSSを書き出し、そのまま作り続ける
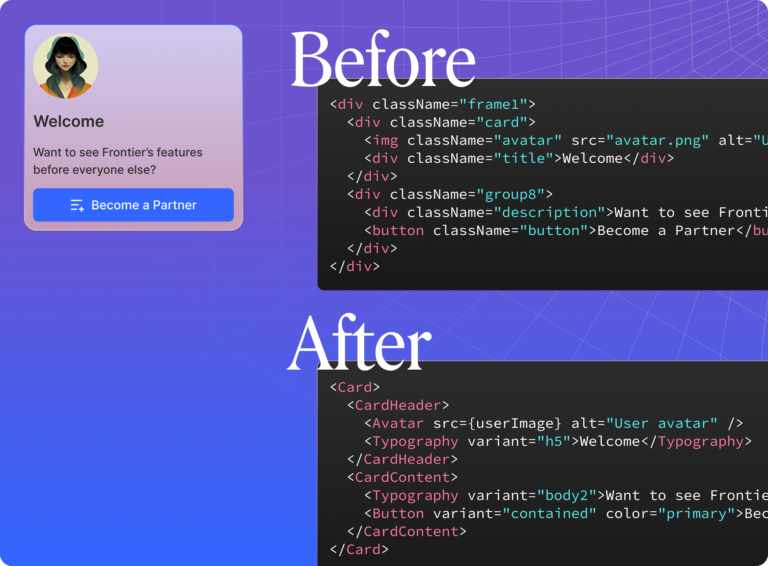
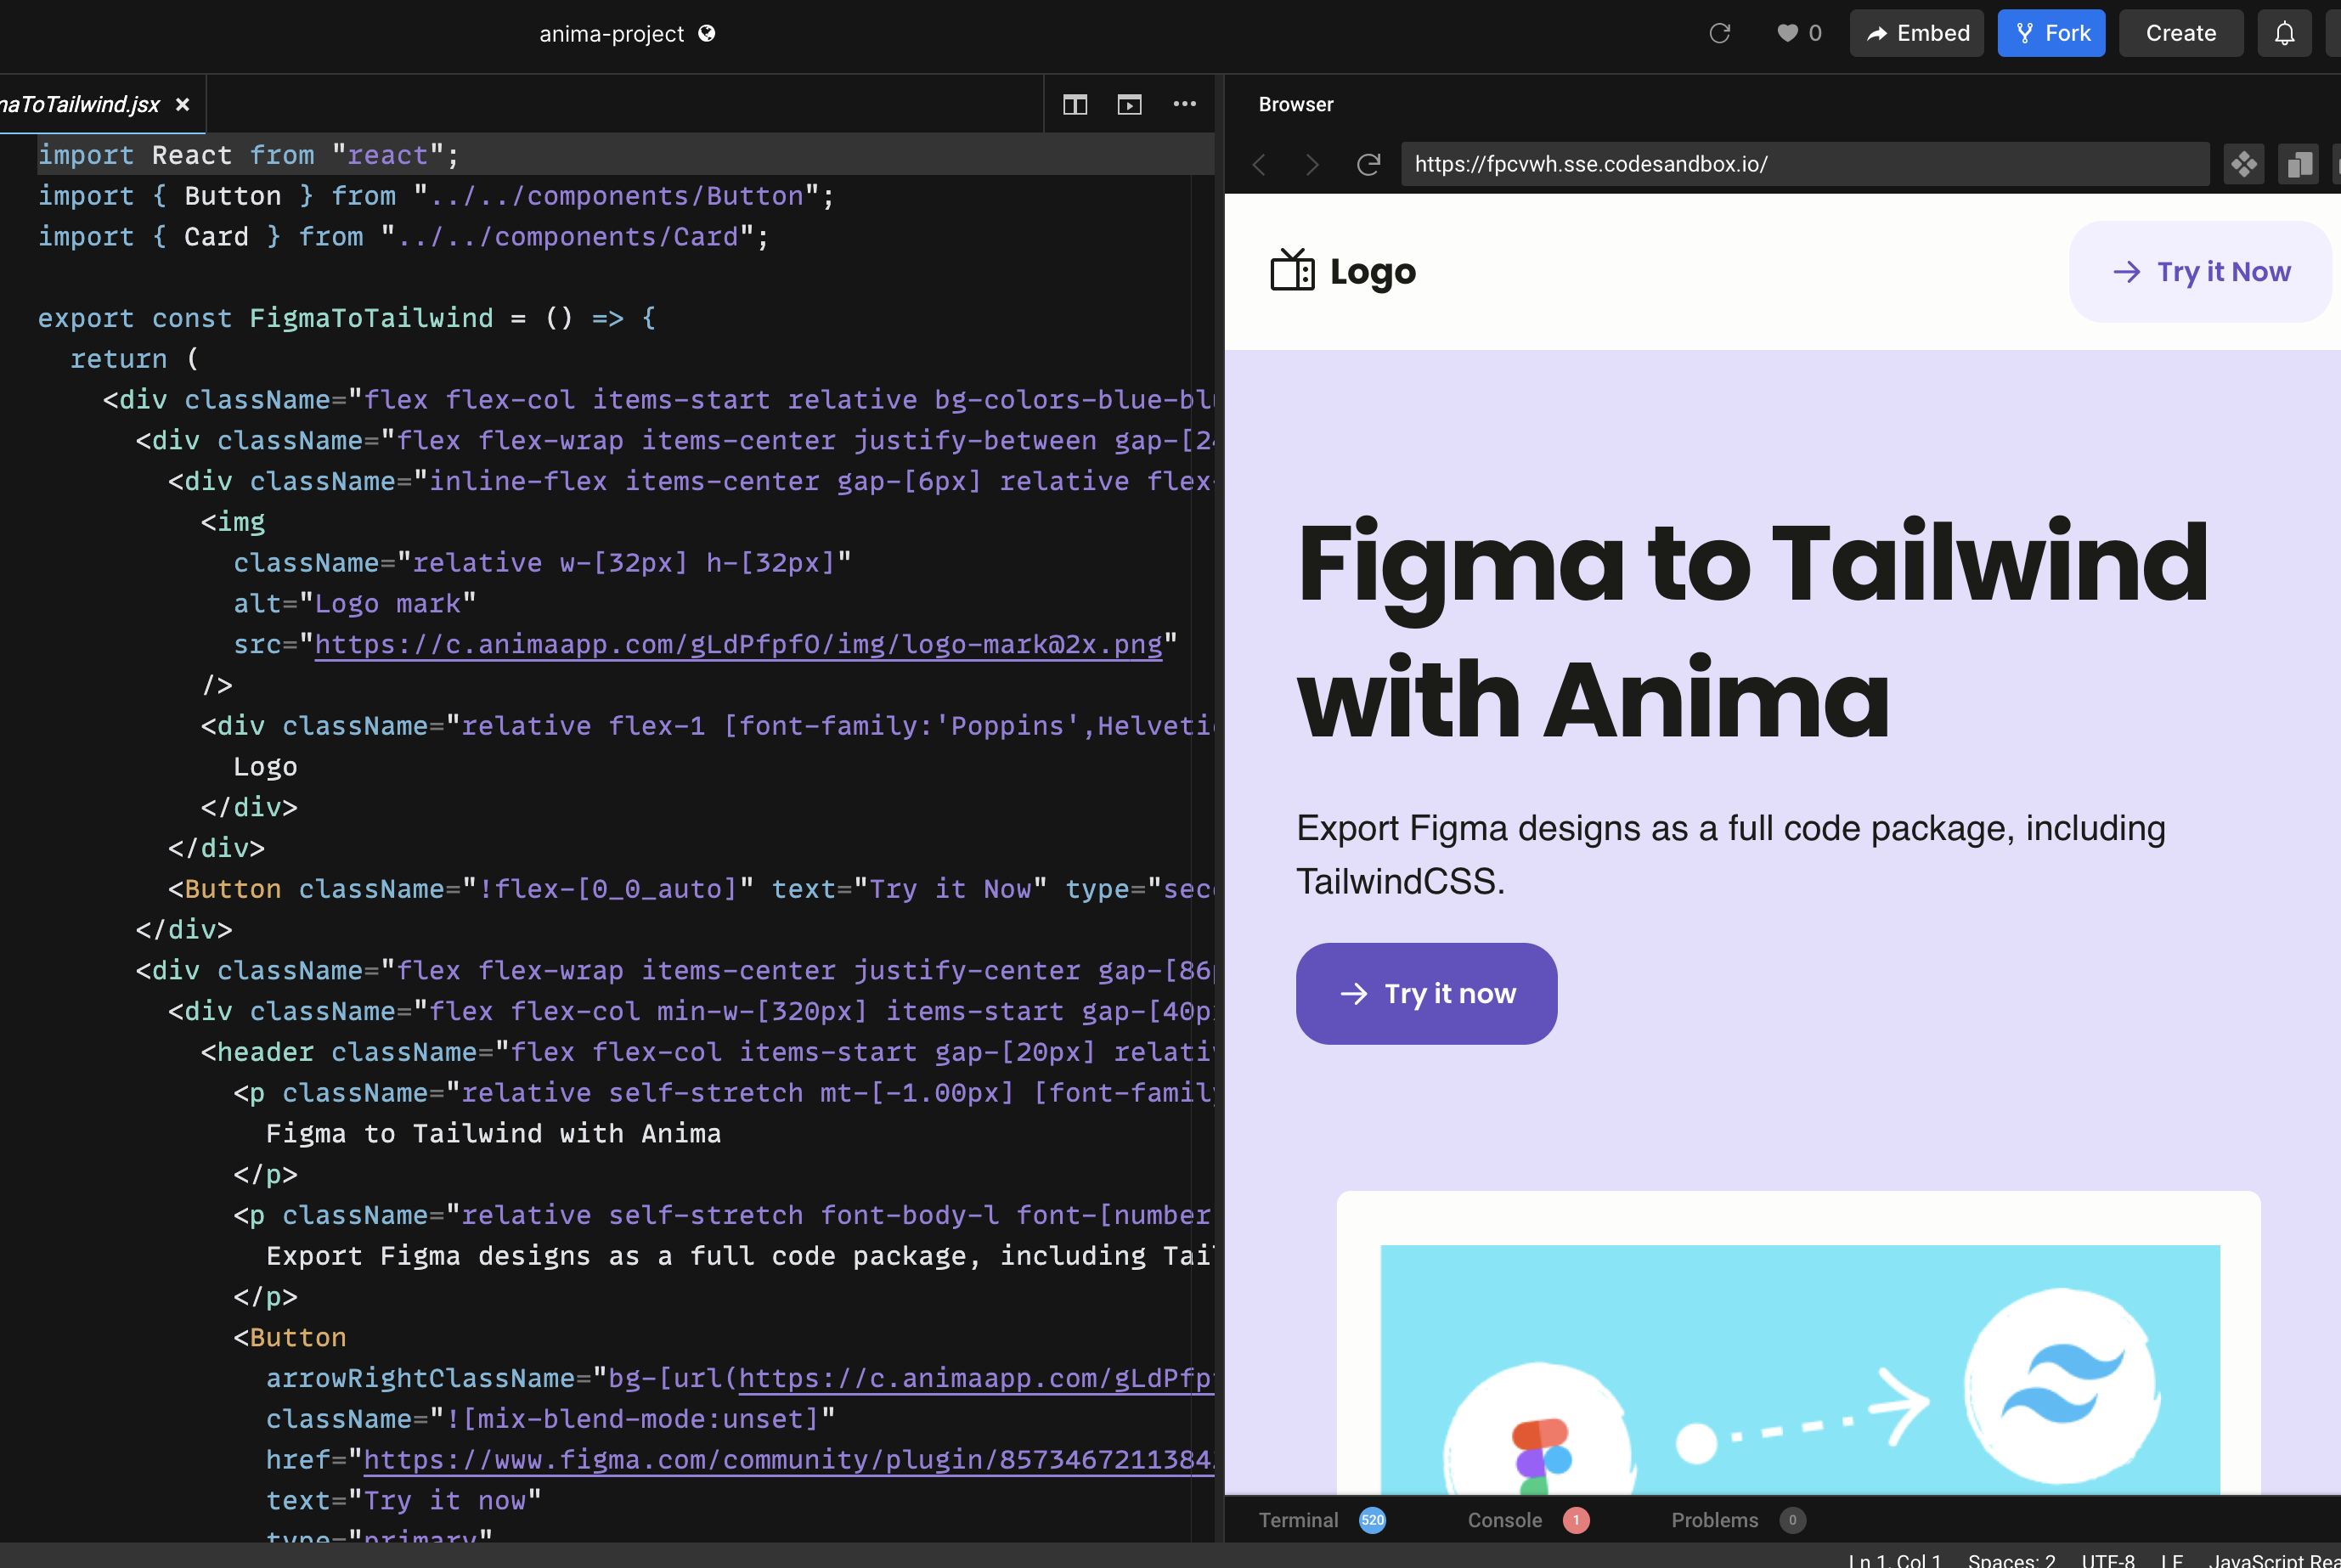
FigmaデザインをTailwind CSSでスタイリングされたクリーンなReactコードに変換したいなら、最短ルートはAnimaのFigmaプラグインです。frameを選択し、ReactとTailwindを選ぶだけで、生成されたコードをコピー、ダウンロード、またはAnima Playgroundで開いて編集・プレビュー・公開を続けられます。
Tailwindは、余白、色、タイポグラフィ、レイアウト、breakpointといったデザイン判断を、再利用しやすいutility classに変換できるため人気です。Animaはその判断をFigmaからfrontend codeへ変換し、各レイヤーを手作業で作り直さずに、デザインから動くUIへ進めるのを助けます。
クイック回答:AnimaでFigmaをTailwind CSSへ
- Anima plugin for Figma
- Select the Figma frame, component, section, or layer you want to convert.
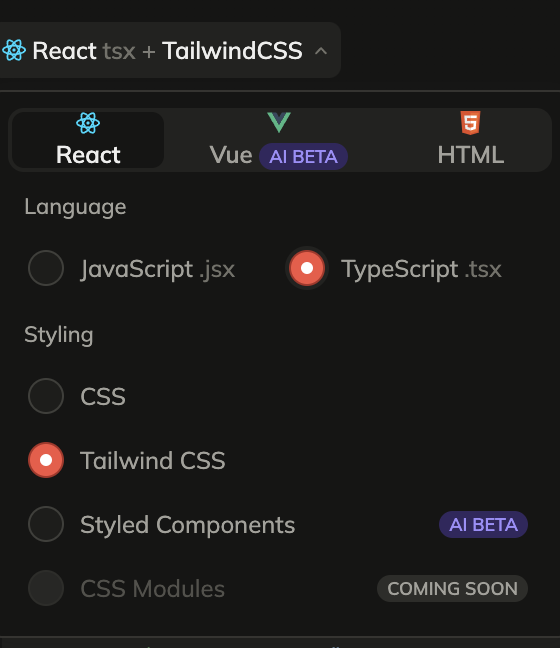
- Choose React with JavaScript or TypeScript, then select Tailwind CSS as the styling option.
- Generate the code, then copy snippets, download the package, or continue in Anima Playground.
- Use Playground to edit by prompt, preview, connect data/auth, publish, or hand off to a coding agent.
なぜFigmaをTailwind CSSに変換するのか
Figmaはチームがproduct experienceを形にする場所で、Tailwindは多くのfrontend teamがその体験を実装したい場所です。難しいのは、構造、余白、style、色、responsive behaviorを失わずにdesignをcodeへ翻訳することです。
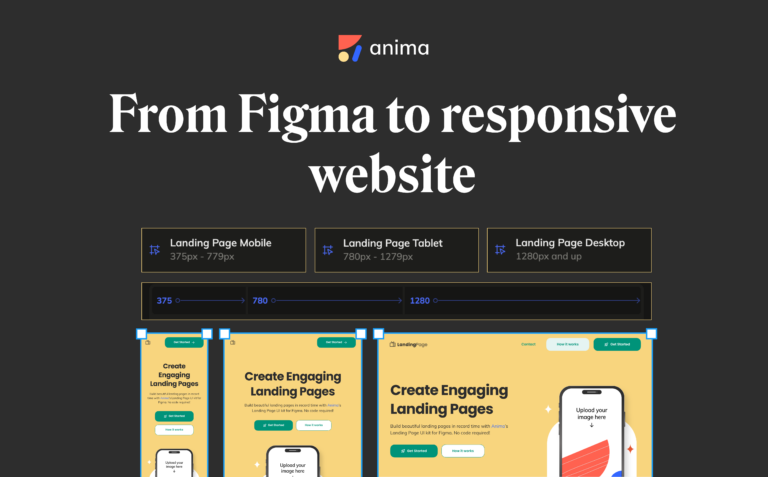
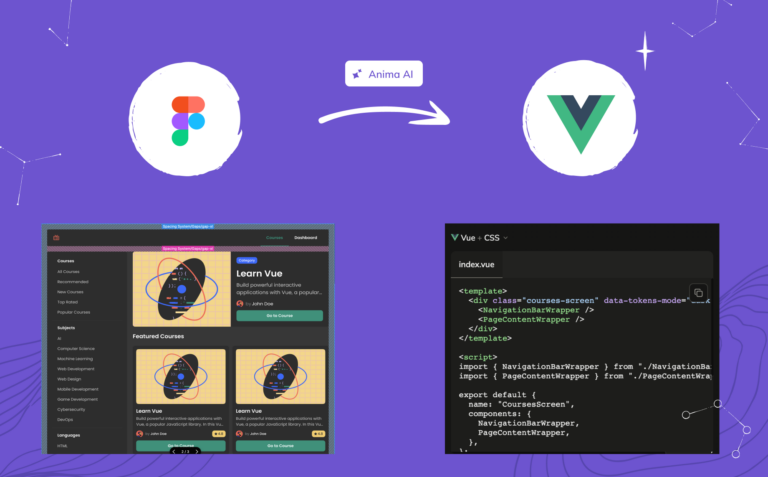
With Anima, you can turn Figma designs into React, HTML, or Vue; JavaScript or TypeScript; CSS or Tailwind CSS; and editable code that can continue into Anima Playground.
FigmaからTailwindコードを生成する前に
- Use Auto Layout. It helps preserve responsive structure and spacing relationships.
- Name important layers clearly. Buttons, cards, nav bars, forms, and sections are easier to understand with clear names.
- Use styles, variables, and components. Repeated colors, typography, spacing, and states are easier to map into reusable code.
- Select the right scope. Start with a focused component or screen, then expand.
FigmaデザインをTailwindに変換する方法
ステップ1:FigmaファイルでAnimaプラグインを起動する
Open Anima in Figma. If you are a first-time user, search for Anima in the Figma plugin menu and sign in or create an Anima account.
ステップ2:React、JavaScriptまたはTypeScript、Tailwind CSSを選択する
Choose React in the framework dropdown, JavaScript or TypeScript as the language, and Tailwind CSS under styling.
ステップ3:Figmaのcomponent、layer、frameを選択する
Select the frame, component, section, or layer you want to export. For the first pass, choose a focused screen or component so you can inspect the generated Tailwind output quickly.
ステップ4:コードを生成して取得する
Once the code is generated, copy snippets, download the generated files as a package, or preview the UI and continue in Anima Playground.


Anima Playgroundで続ける
Tailwind codeを書き出すことは便利ですが、最良のworkflowは「コードをコピー」で終わりません。デザインを変換した後は、Anima Playgroundでlive previewとeditable codeを並べて作業を続けられます。
In Playground, you can refine layout, add states, create responsive menus, connect forms to data, add authentication, publish, or export the project.
プラグインとPlaygroundの使い分け
Figmaファイルから始め、design structureをできるだけ正確に取り込みたい場合はAnima pluginを使います。chatで編集、preview、機能追加、publish、export、coding agentへのhandoffをしたい場合はPlaygroundを使います。
The best path is often both: start in Figma, generate React + Tailwind with the plugin, open the result in Playground, and vibe code the final details while keeping the design intent intact.
FigmaからTailwindへのよくある質問
Can Figma export Tailwind CSS by itself?
Figma is primarily a design tool. A plugin like Anima adds the conversion layer between Figma design and frontend code.
Does Anima generate React with Tailwind?
Yes. In the Anima plugin, choose React as the framework and Tailwind CSS as the styling option. You can also choose JavaScript or TypeScript.
Can I publish the result?
Yes. If you continue in Anima Playground, you can preview, refine, and publish the project from the browser. You can also export code when you want to continue development elsewhere.