How to create overlays in your Sketch prototypes2 min read
Reading Time: 2 minutesPart #4 of a 5 part series: prototyping with Anima in Sketch
What are Overlays?
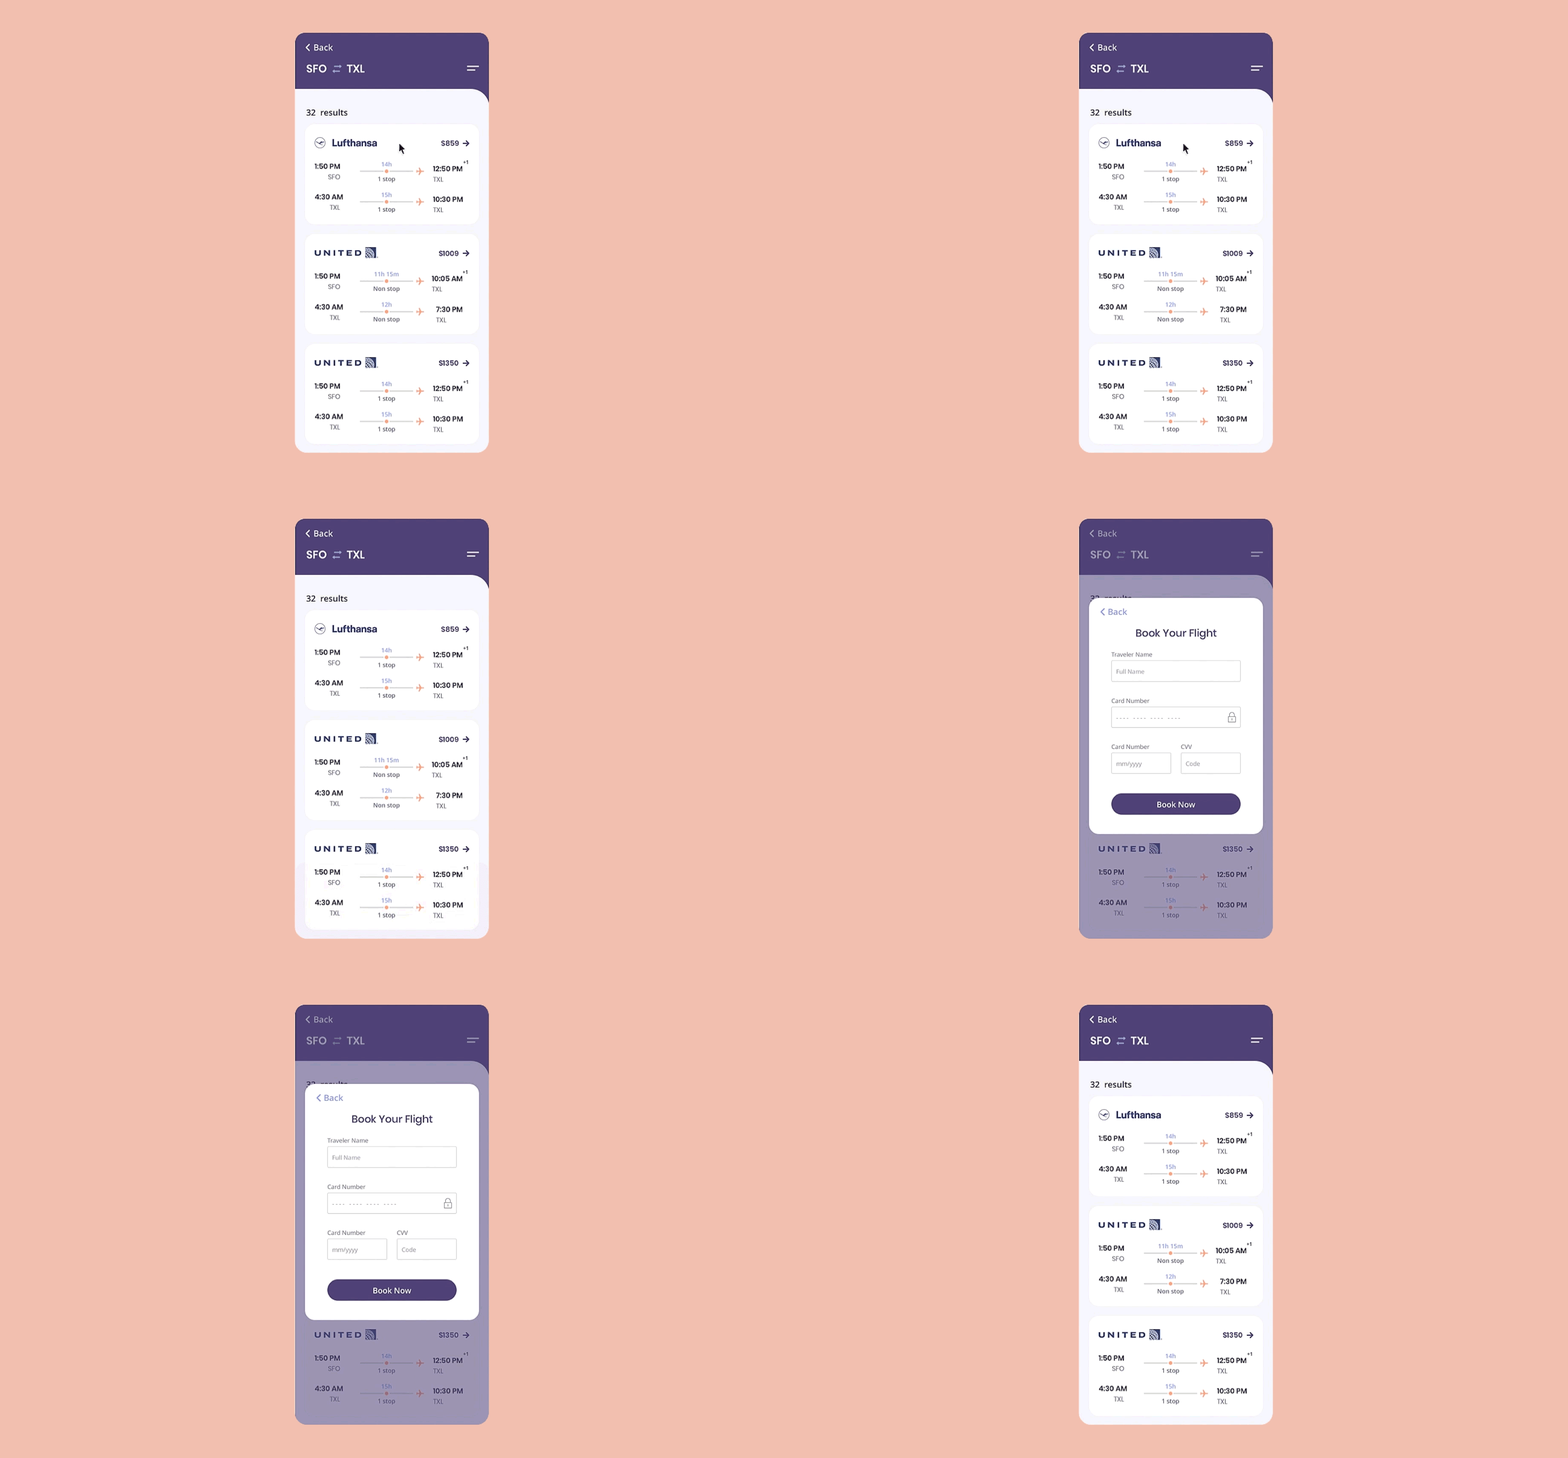
Overlays allow you to show new content on top of other content. Overlays are very similar to links, except they have a transparent background and appear on top of the original page.
Overlays can be used for many use cases: modal windows, drop-down menus, pop-up notifications, all without leaving your current screen.
In this example, the payment method is an overlay.

As easy as creating two links!
Creating Overlays
- Select the Layer that will trigger the Overlay
- Click Prototype tab > Flow > Links > Connect it to the Overlay artboard
- Mark the ‘Overlay’ check-box

Anima Panel > Prototype > Flow > Links > Overlays
- Click ‘Edit Transition’ to customize the animation between the two artboards. You can control the Direction, Duration, Delay and Curve.
Or even embed your own CSS if you like to.

Edit Transition
Dismiss Overlay
- Select the Layer that will dismiss the Overlay, and link it to the ‘Dismiss Overlay’ option at the top menu bar.

Dismiss overlays
Tip!
Change the artboard background color to a transparent color. So you could see the original artboard underneath. Make sure that it is “Include in export”.
Preview in Browser
When it’s ready — it’s time to see it come to life. Hit ‘Preview in Browser’.
👉Live preview here
Discover more tips for prototyping with Anima in Sketch:
- Part #1 out of 5, prototyping with Sketch: How to create interactions in Sketch prototypes
- Part #2 out of 5, prototyping with Sketch: How to add breakpoints to your Sketch prototype
- Part #3 out of 5, prototyping with Sketch: How to add external URL links to your prototype
- Part #5 out of 5, prototyping with Sketch: How to add background video to your Sketch prototype
As always, we’re excited to hear your feedback!
Join the discussion or show off your designs on Facebook, Twitter, Slack, Instagram, and vote for new features at UserVoice.
Stay creative!
❤️ Anima team


 Figma
Figma Adobe XD
 Blog
Blog


